Important notice: As of 1 June 2023, RadioKing will no longer provide maintenance for the StudioKing broadcast software. In other words, the software will no longer be updated and will remain in its beta version. To avoid instability during use, we recommend that you choose another broadcast software from the list suggested in the article "Guide to live broadcasting"
To broadcast live on your radio station, you can download StudioKing for free under the Live Tab of your Radio Manager. In this tutorial you will discover all the steps to stream live with StudioKing:
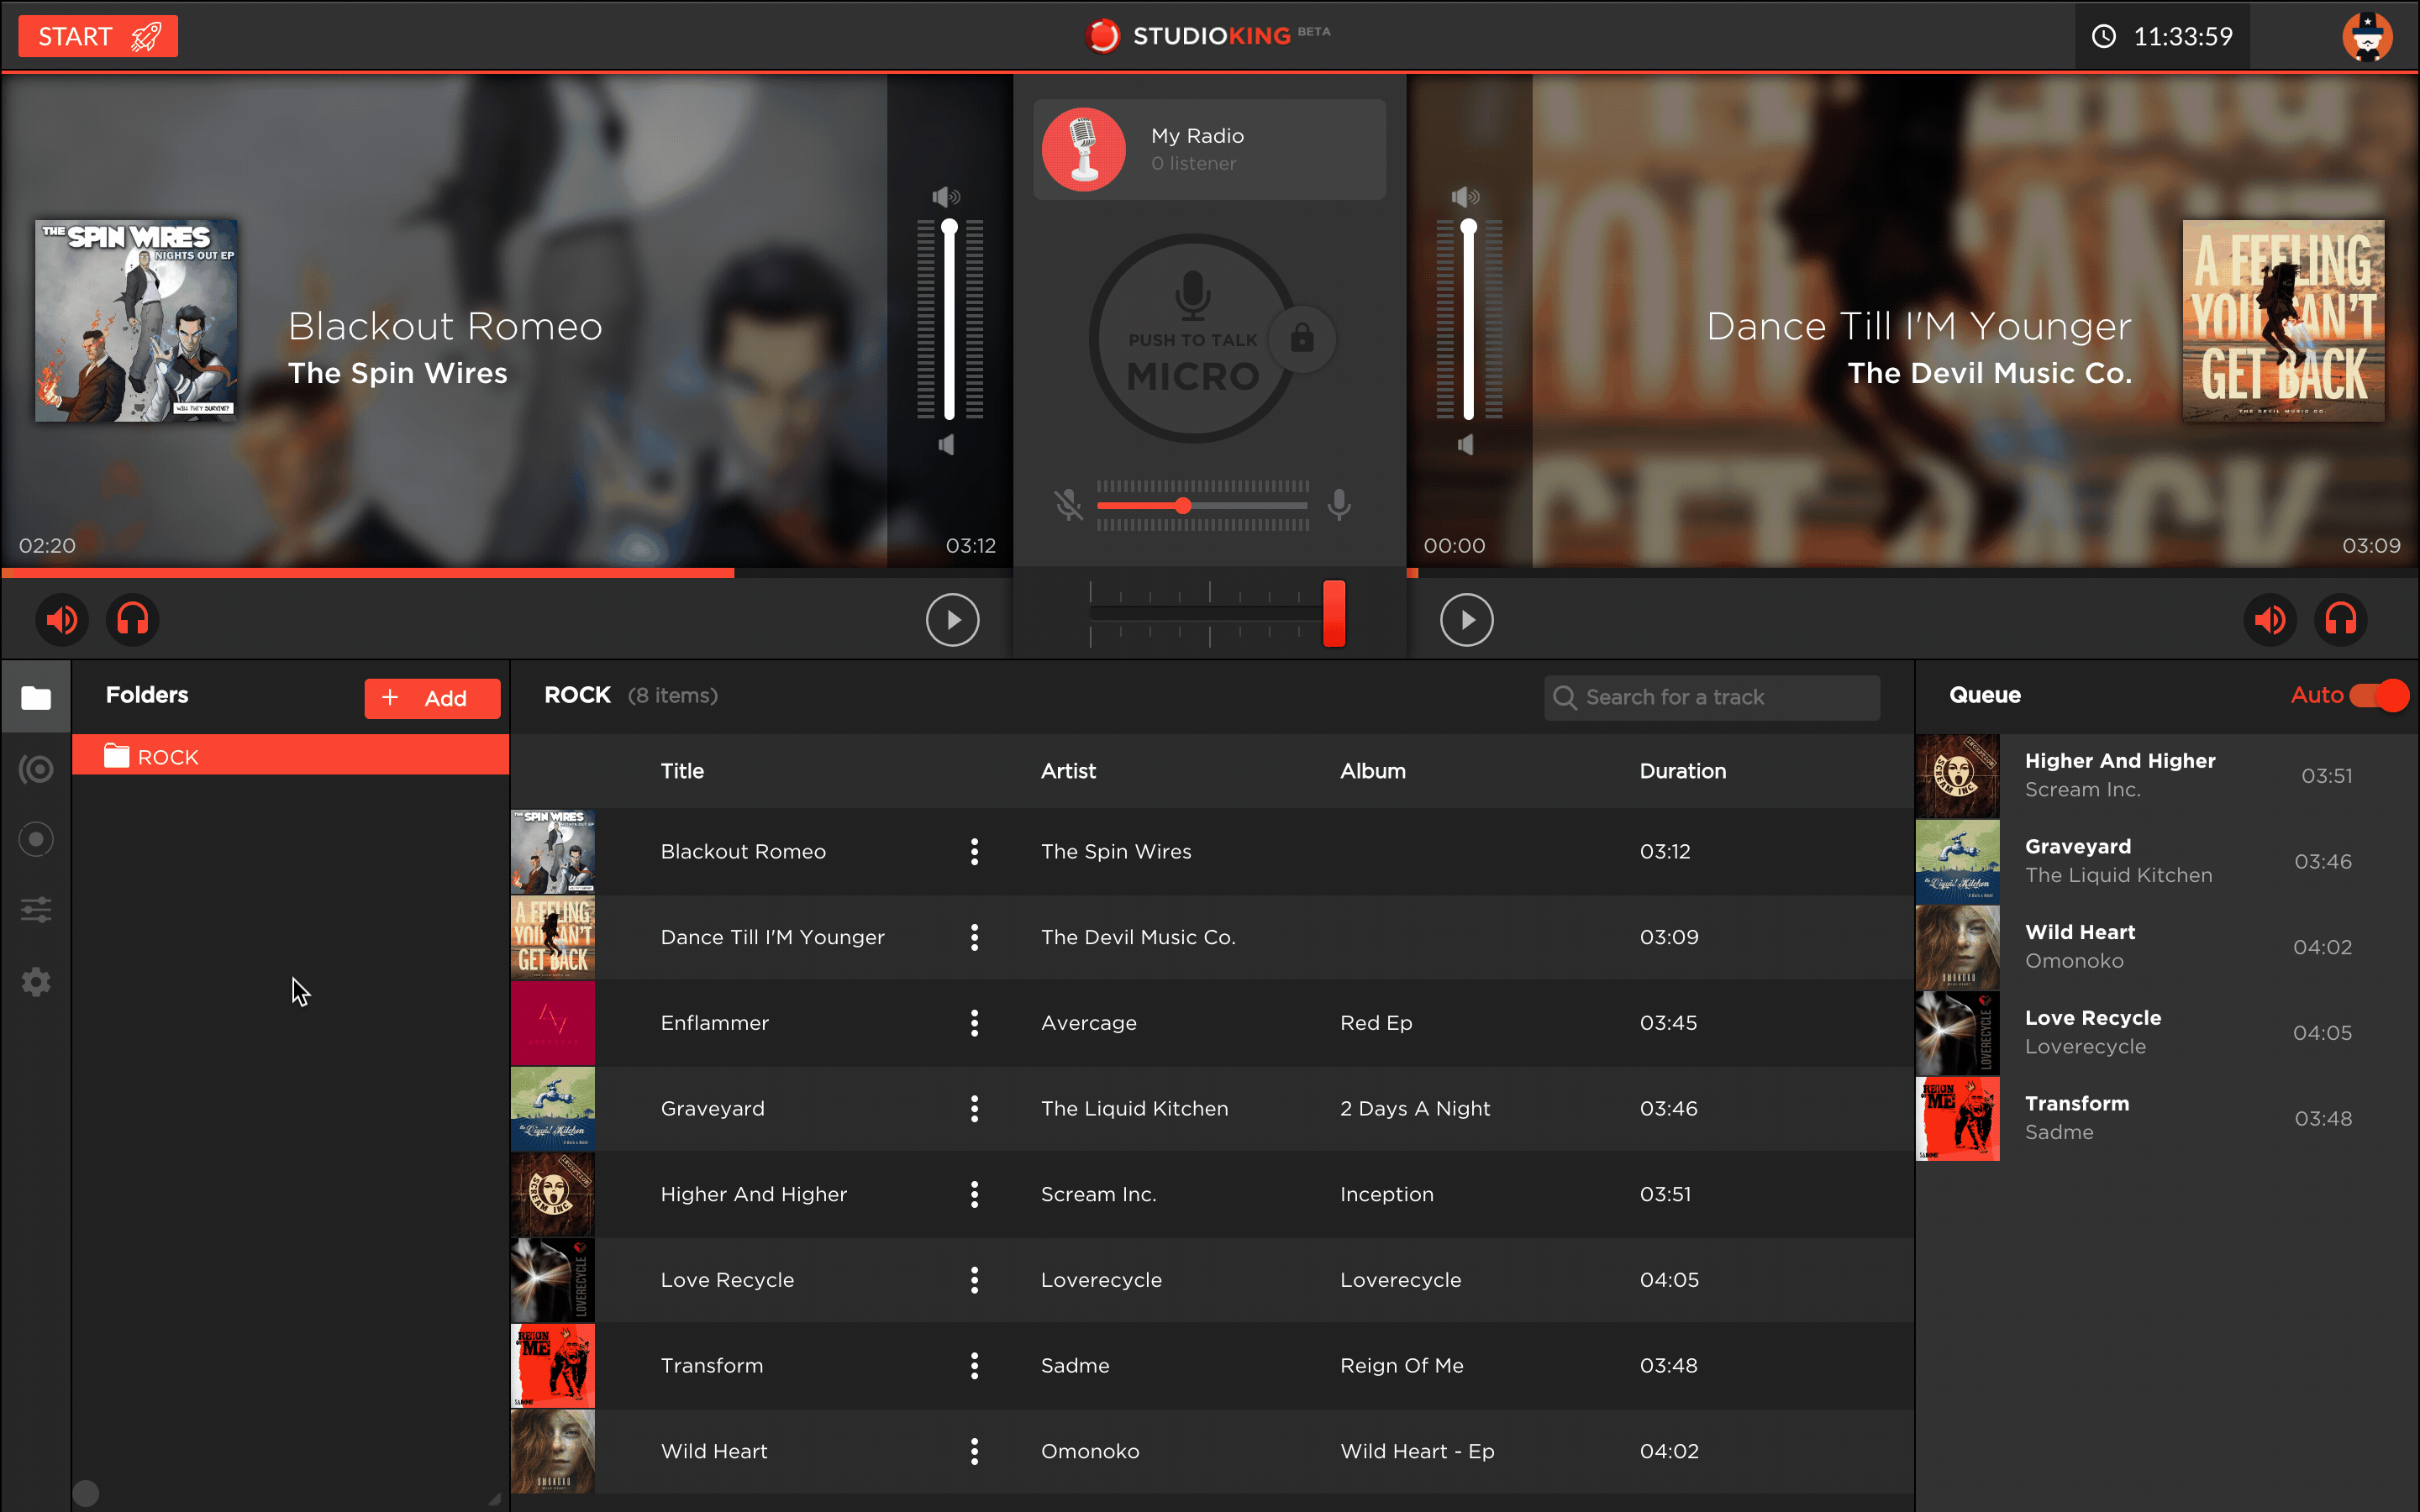
Importing Tracks
Managing the queue
Broadcasting tracks live
Managing the next track
Pre-listen to a track
Speak live on air
Samplers
Input/ Output
Settings
Start Broadcasting live
Record your live broadcast
You may also want to discover StudioKing in this video tutorial:
IMPORTING TRACKS
This section of StudioKing is divided into 3 parts: 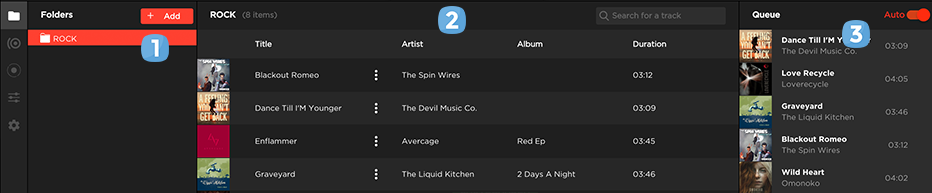
Part 1: Add all your tracks directly by clicking on the Add button. Browse the folder on your computer that contains your music and click on Add this folder.
Part 2: All of your tracks will appear in the central part of the software.
Part 3: Once you have uploaded your tracks to StudioKing, you can drag them into the queue or drag and drop them directly onto the decks.
MANAGING THE QUEUE
In this section (3), you'll find all the tracks that will be broadcast during your live broadcast session. You can directly drag a track from your queue onto the decks or leave the queue in auto-play. In other words, the titles will be broadcast in the order of your waiting list.To stop auto play, click on the Auto slider.
To delete tracks, simply click on the recycle bin.
You can also change the order of tracks in your queue by clicking on them and dragging them to your preferred position.
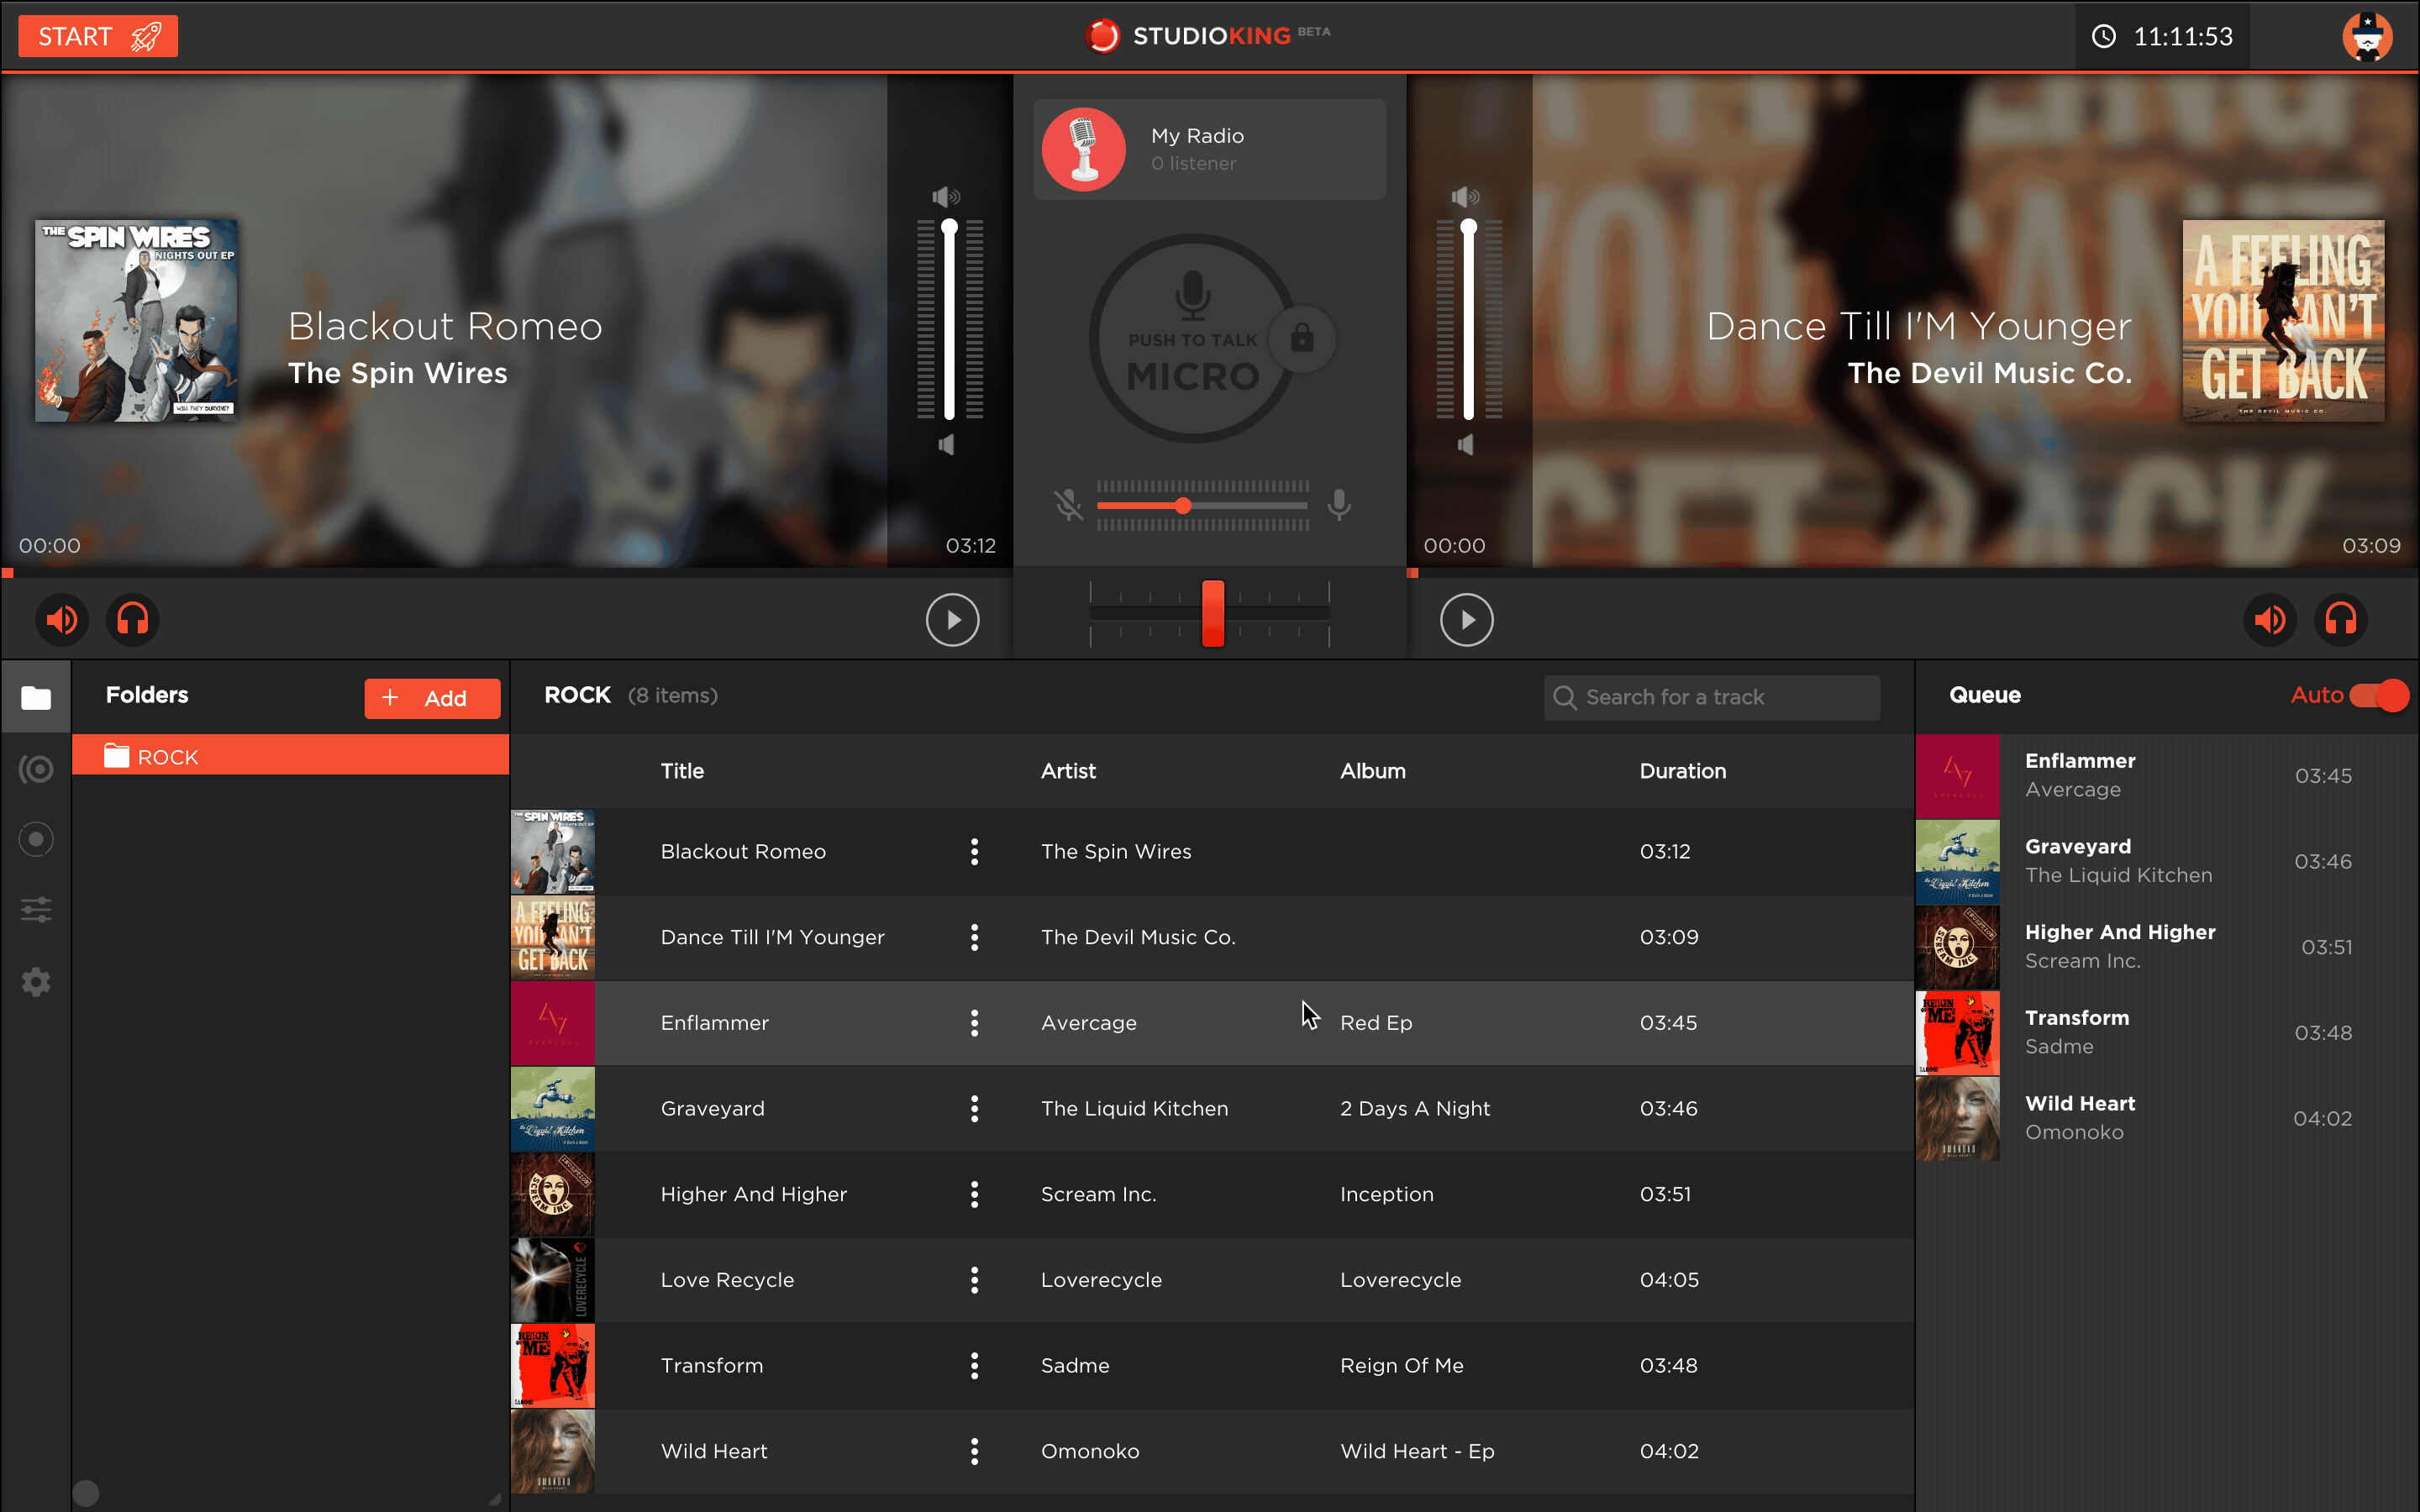
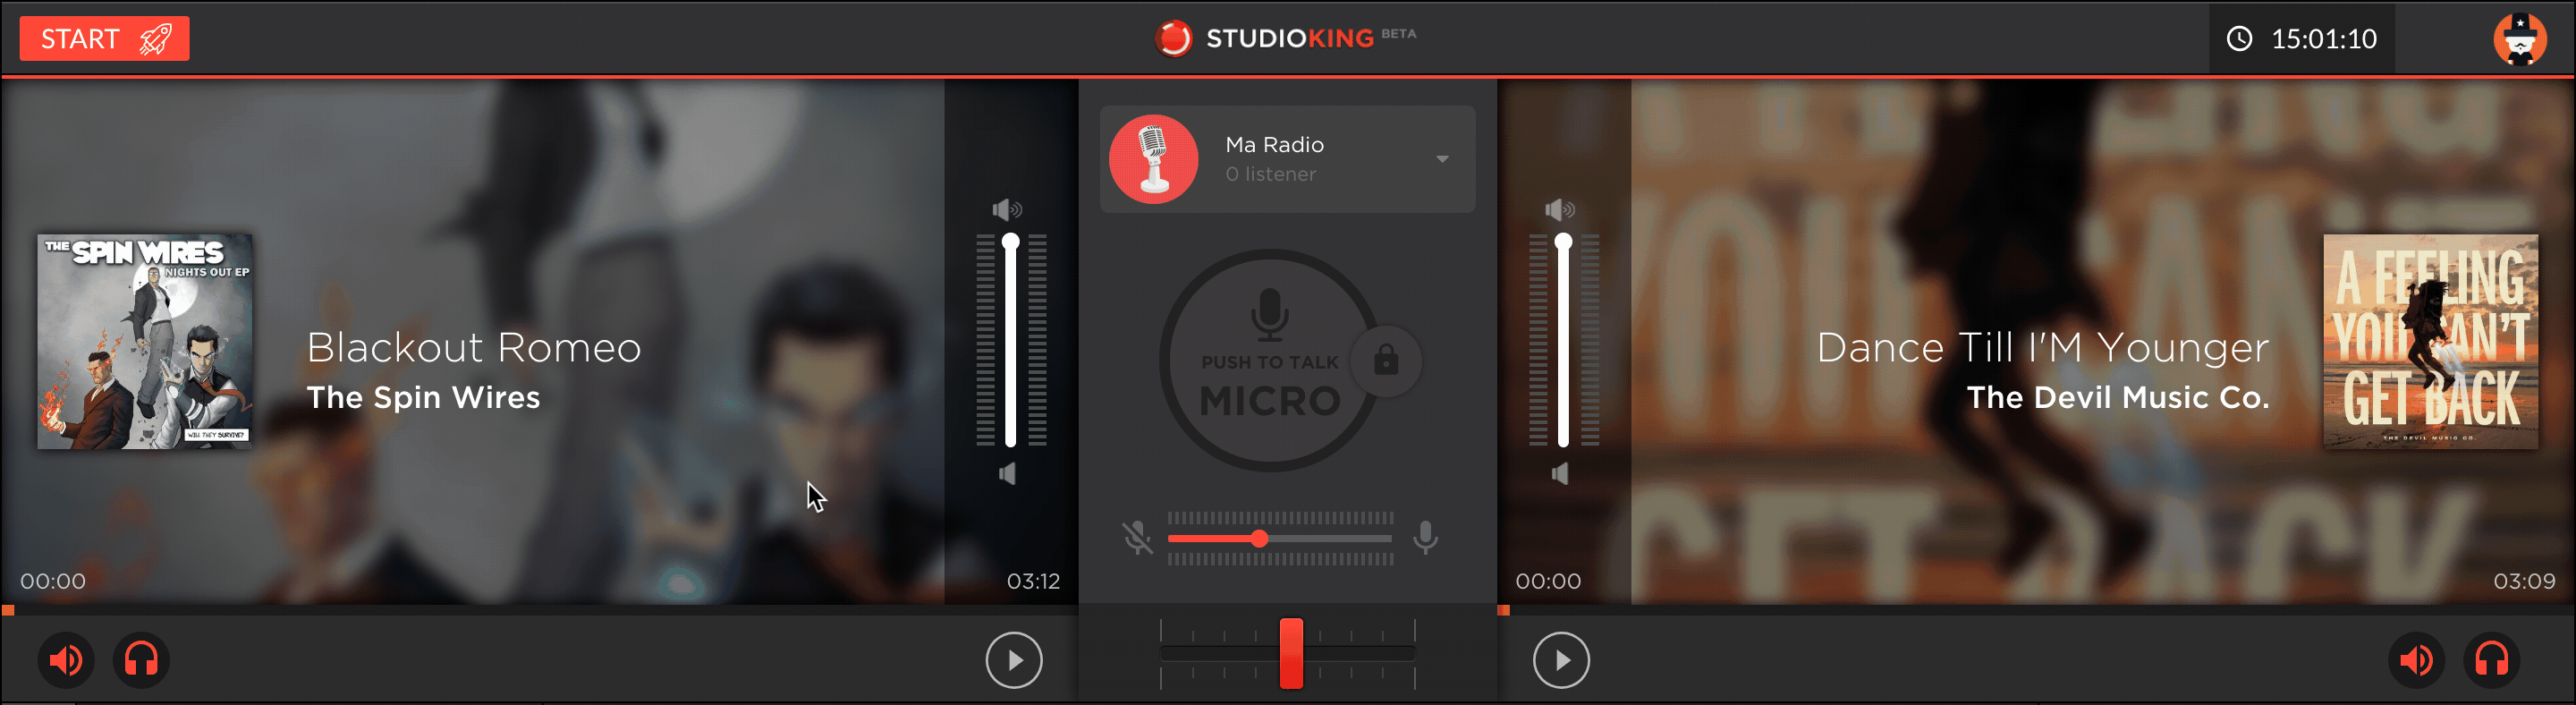
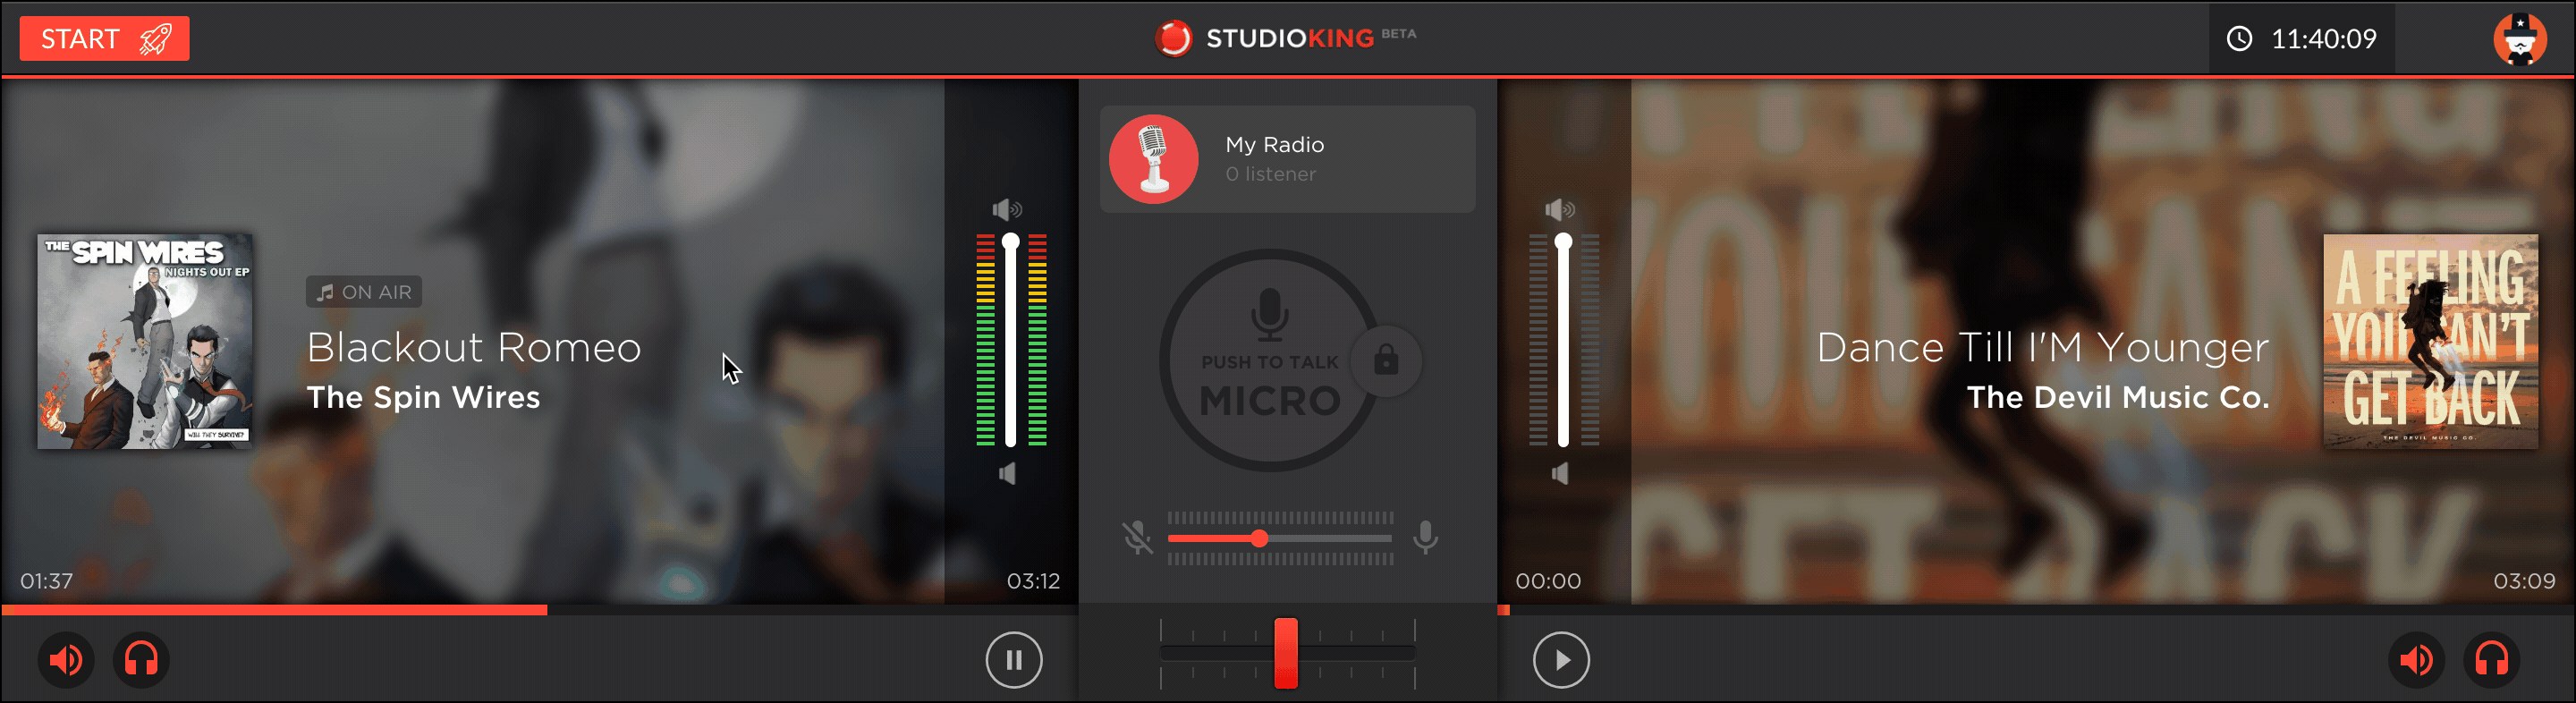
BROADCASTING TRACKS LIVE
StudioKing features 2 decks for live mixing. Place the title you want to broadcast on one of the two decks and simply click on Play to play your title, don't forget to launch your live broadcast by clicking on the red start button. You can disable headset feedback by clicking the headset icon so you will not hear the current broadcast (rest assured, your listeners will still be able to hear it). You can also disable the broadcast for your listeners by clicking the volume icon.
MANAGING THE NEXT TRACK
To play the next music, there are two options:
- You can wait until the end of your current title, the crossfader will automatically switch to the other deck and play the next track
- You can move the crossfader manually and point it to the title you want broadcast
PRE-LISTEN TO A TRACK
To pre-listen to a track:
- Turn off the headphone return on the current title by clicking on the headphone icon
- Set the crossfader to the middle
- Turn off the broadcast on the deck of the title to be pre-listened by clicking on the volume icon
- Press Play

The crossfader allows you to switch between tracks at any time but also to play 2 tracks on air by setting it to the middle and pressing the play button on both decks.
SPEAK LIVE ON AIR
With StudioKing you can go live for a short intervention or to present a longer program.
To announce the title of a track or simply to speak for a few seconds, click and hold down the microphone.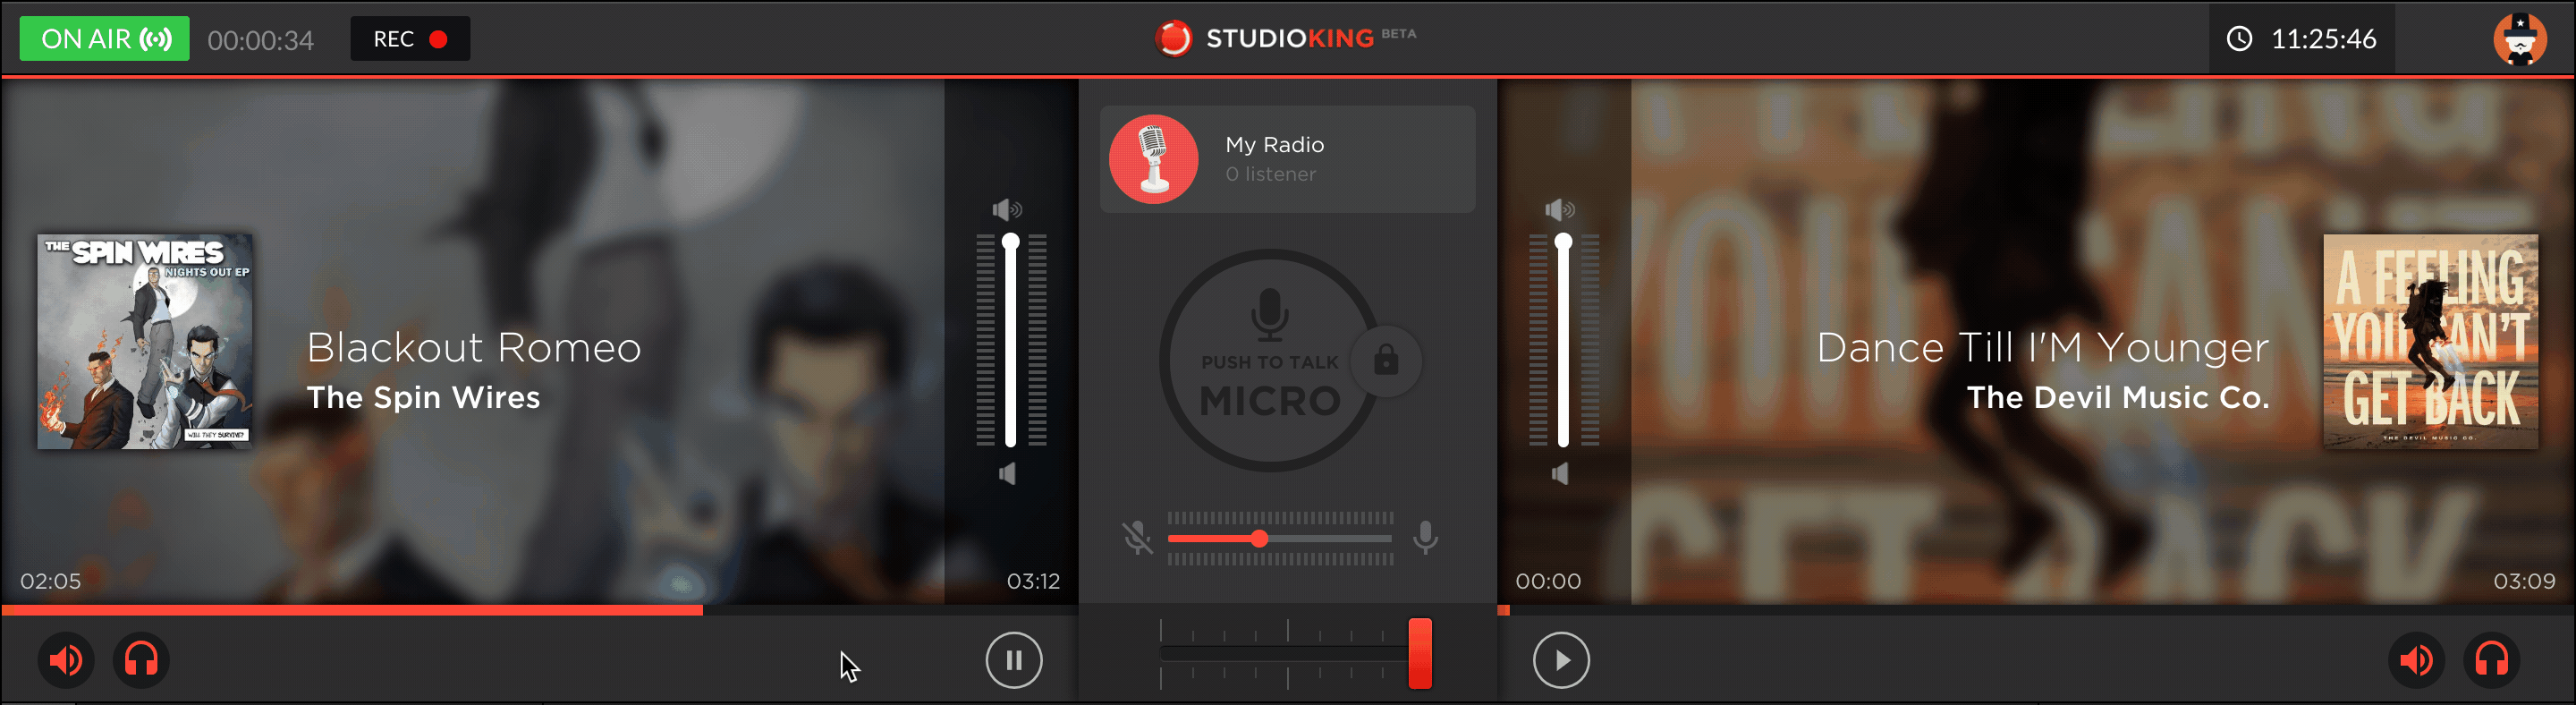
To speak during a longer intervention simply click on the padlock, you can then speak without having to hold down the microphone. When you're finished, simply click the lock button again to stop speaking live on air.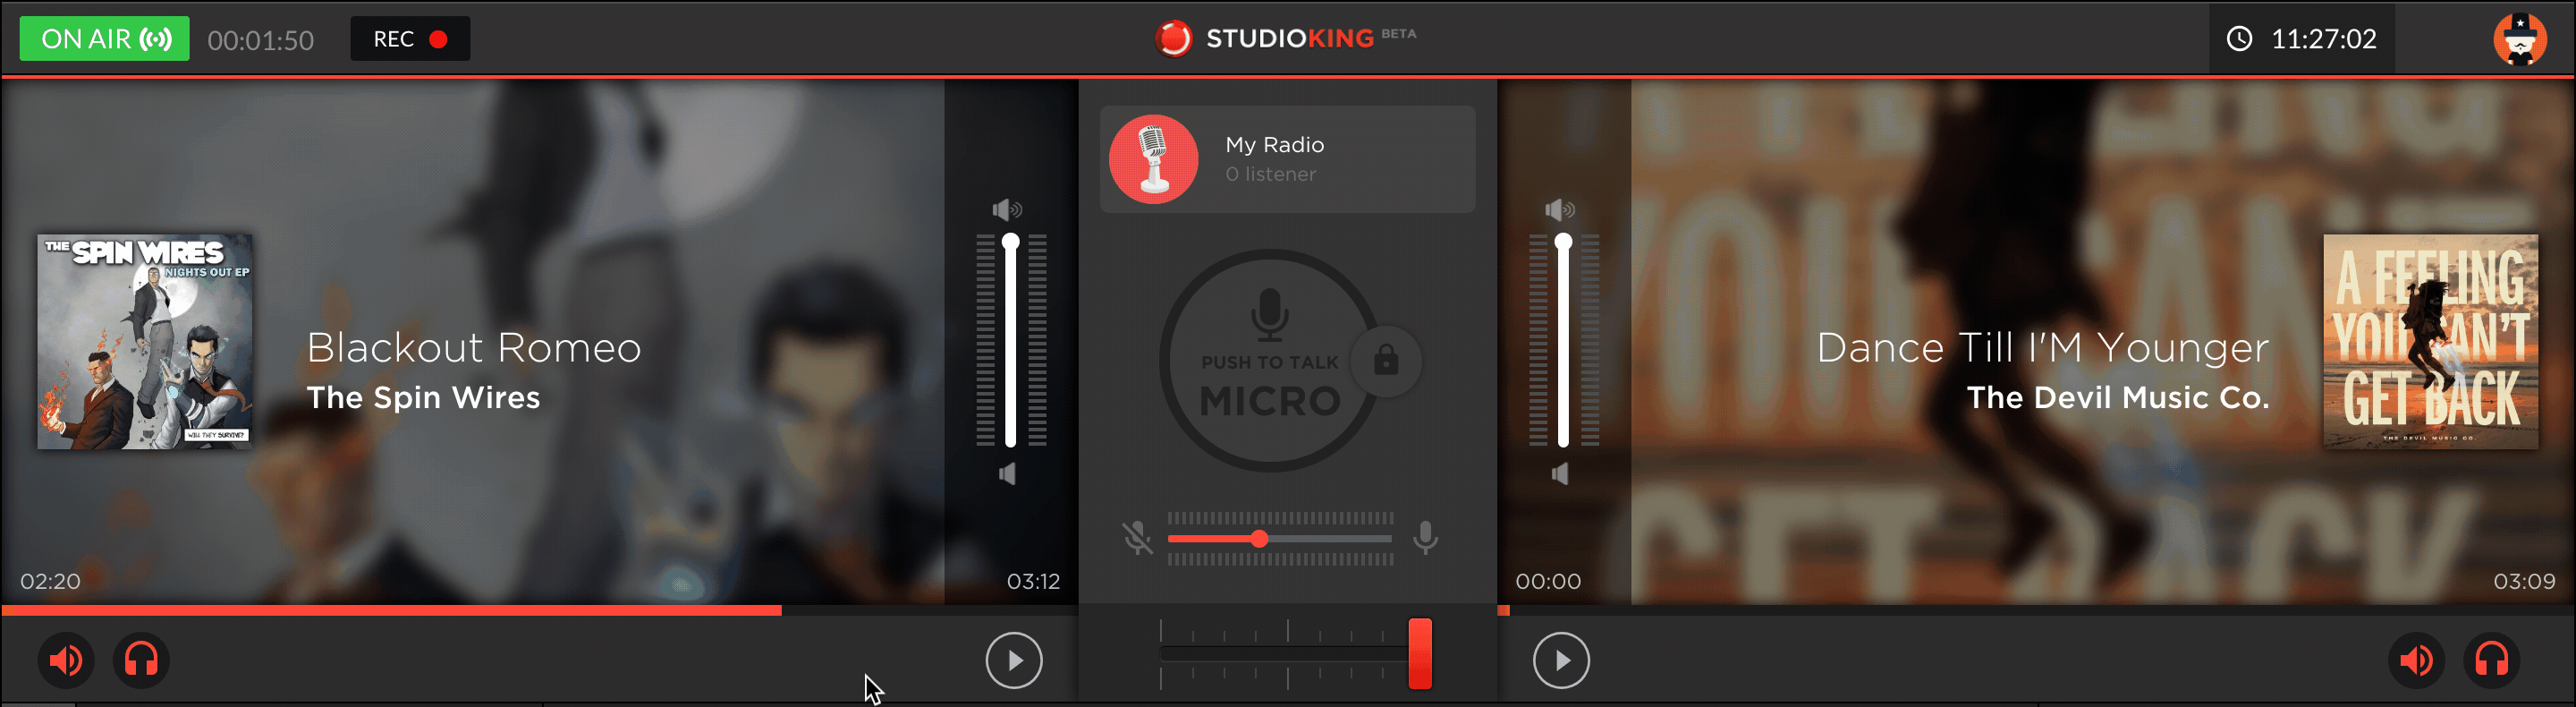
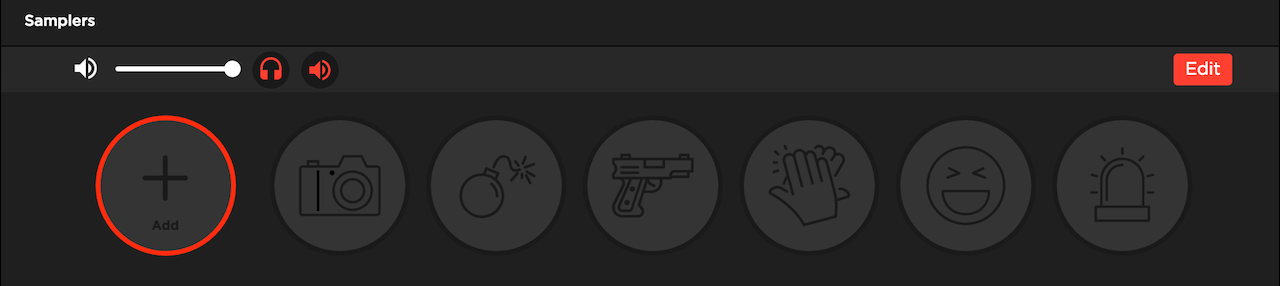
SAMPLERS
Samplers are short sound bites of several seconds that allow you to insert sounds during your lives (for example: applause).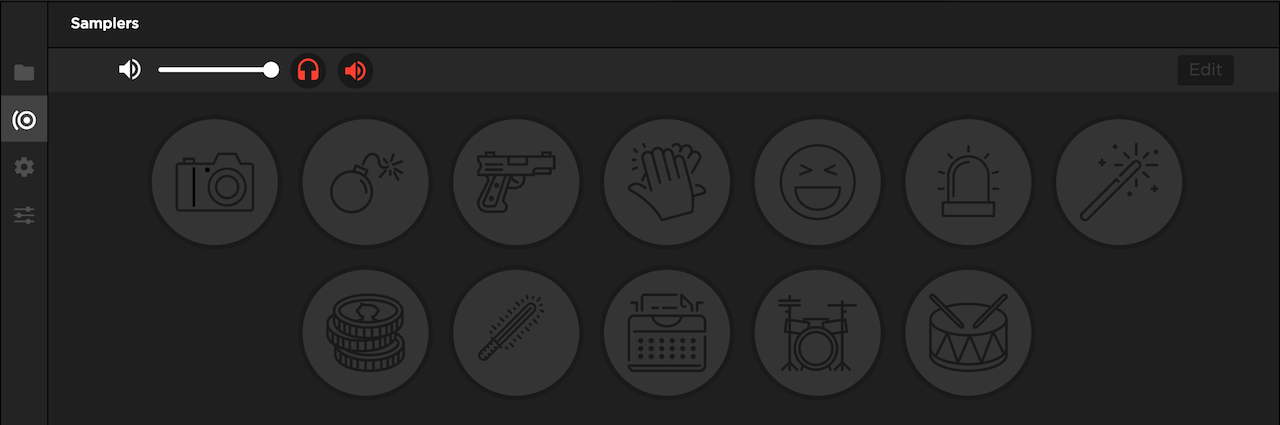
StudioKing has 13 samplers but you can also add your own.
INPUT/ OUTPUT
The input/ output tab will allow you to:
-
Choose your input device (your microphone)
-
Manage the volume of the music when your microphone is in use
-
Enable microphone feedback
-
Choose your output device
Top Tip: If you don't see your input and output devices, restart the software by clicking on your username at the top left of your software.
SETTINGS
Access the StudioKing settings by clicking on the settings icon on the left..png)
Here, you can:
- Change the duration of the fade (the transition time between 2 songs) and the fade threshold
- Choose whether you want to add a customized title, i.e. if you want the names of your tracks to be replaced by another title during your live session "Mix - Non stop" for example.
- Change the language of your software (English or French)
- Change the recording quality of your live broadcast
START BROADCASTING LIVE
When you’re ready to start broadcasting, simply click on the red “START” button in the top left-hand corner. When your live broadcast begins, the red START button will become a green ON AIR button. You’ll also see a timer appear.
To end your live broadcast, click on the green “ON AIR” button. This will stop your live broadcast, and the recording of your live broadcast if you have activated it.
RECORD YOUR LIVE BROADCAST
When you launch your live broadcast, a message will appear asking whether or not you would like to record your live broadcast. To record, simply click on Yes and recording will start automatically, it will stop as soon as you stop your live broadcast.
You can choose if this message appears each time you broadcast live or not. Simply go to the Settings Tab > Scroll down and under “auto-recording” you can choose your preferred settings.