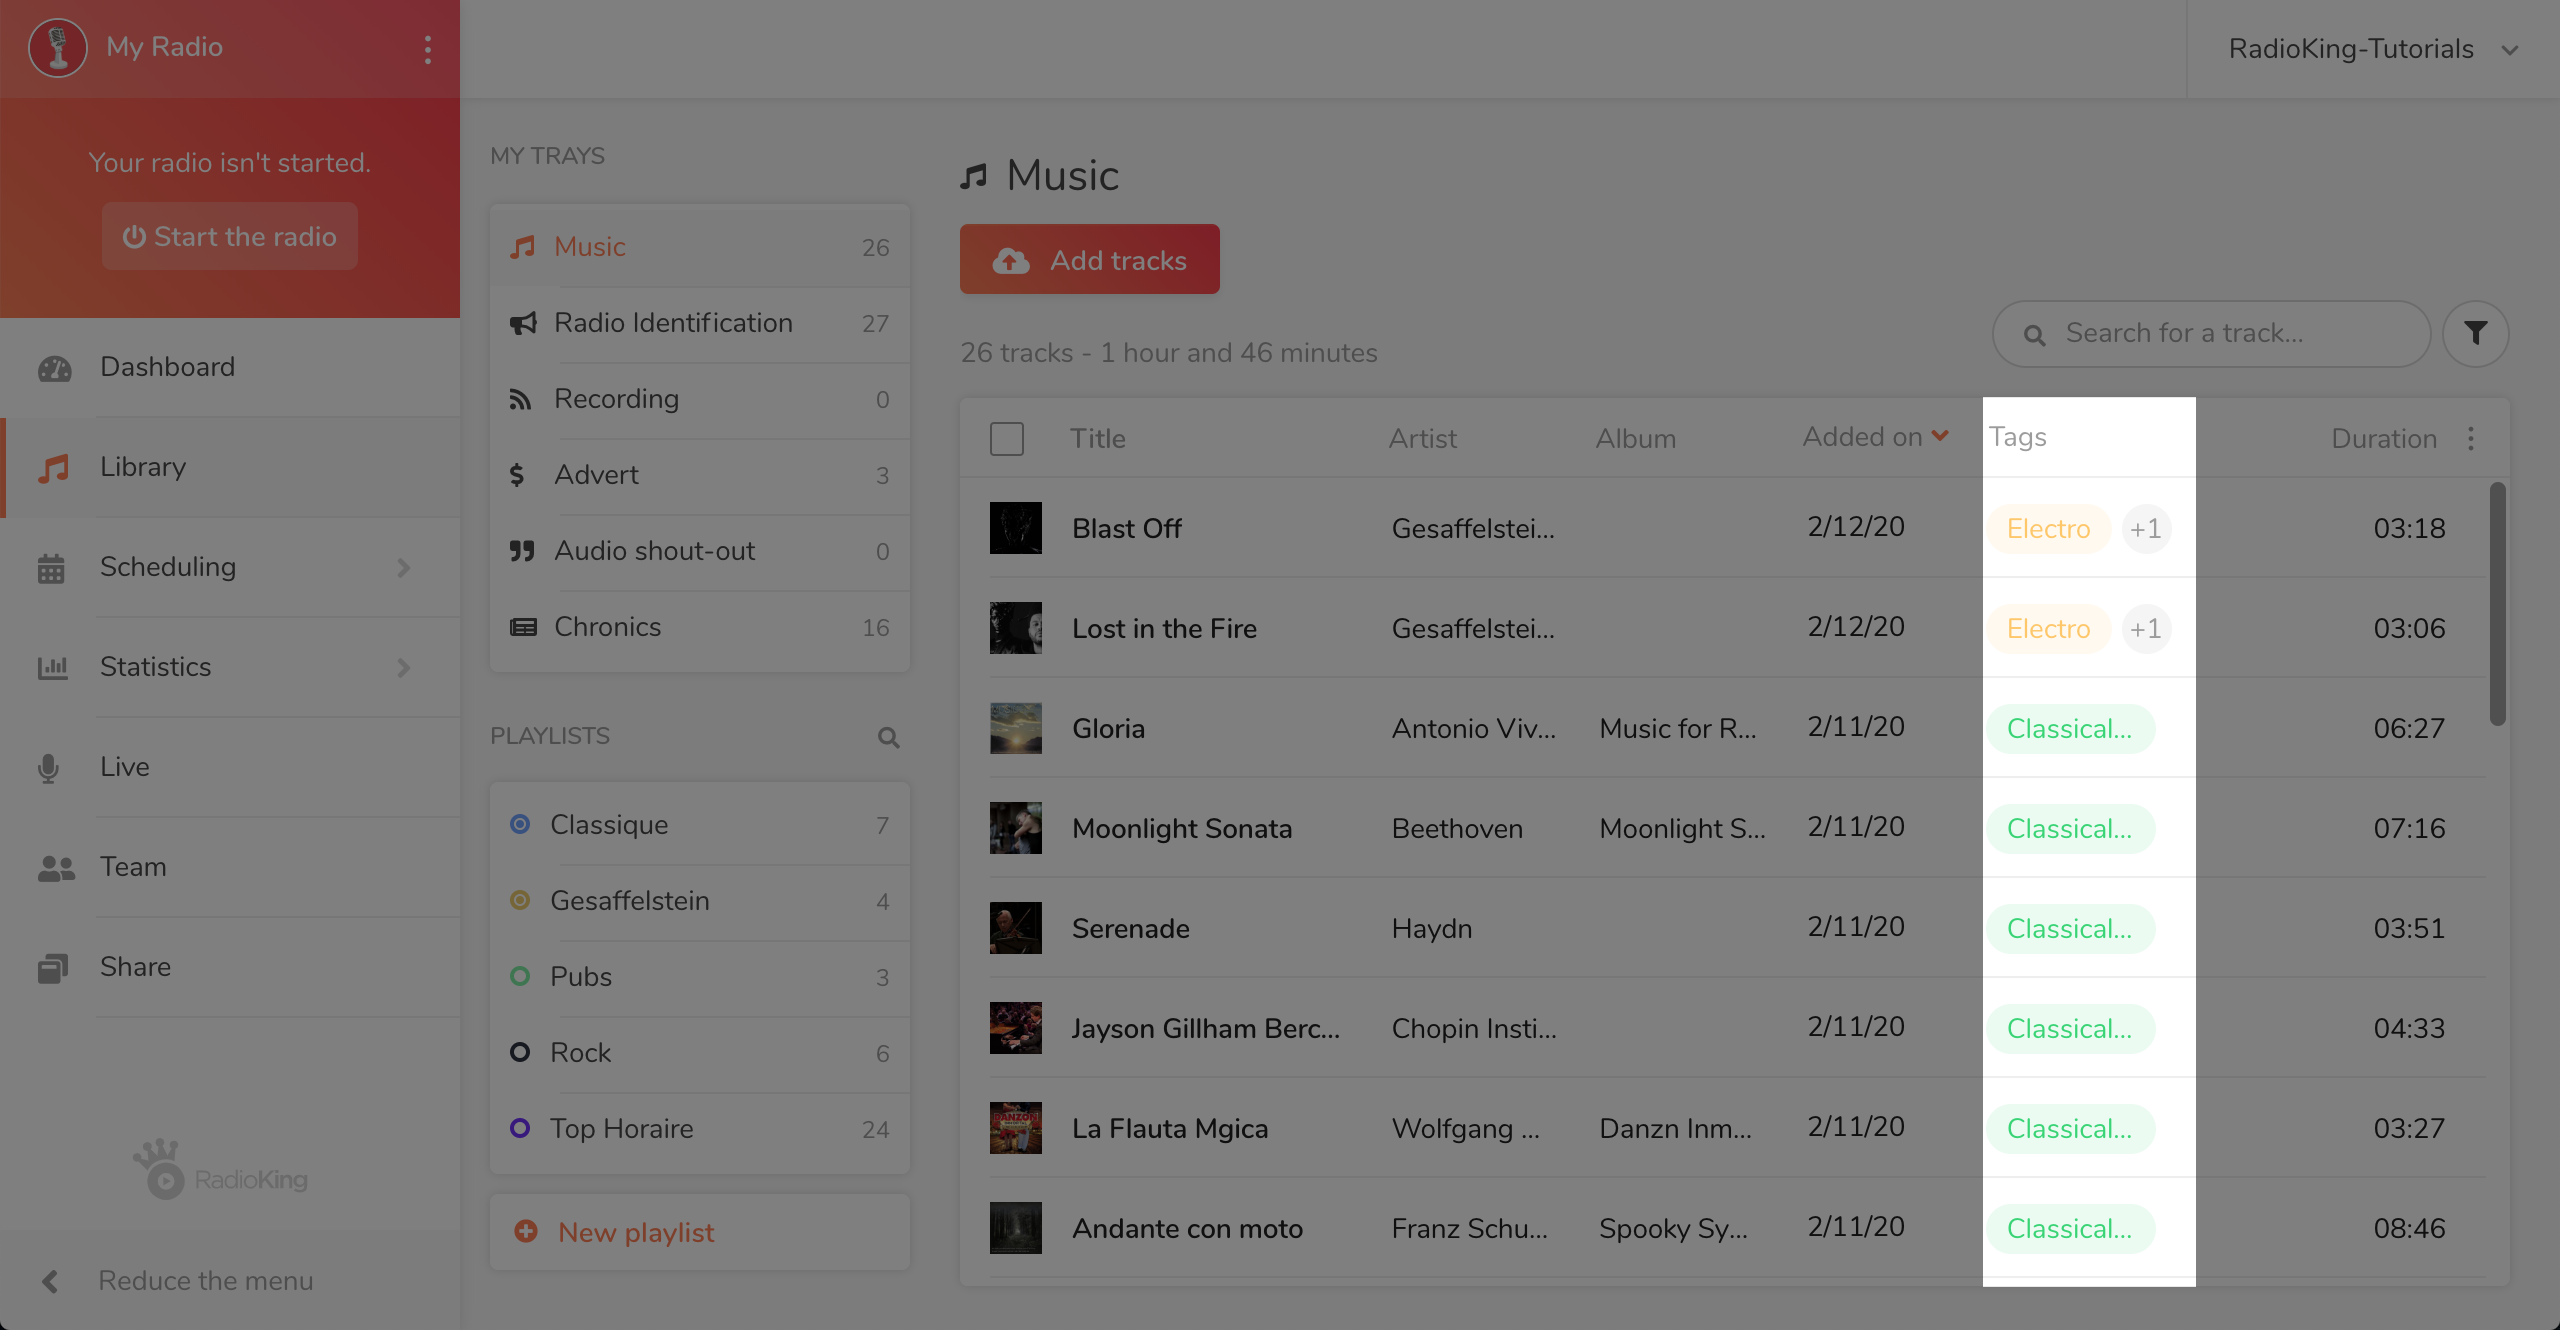
Tags are keywords or categories, which you can use to sort your music, podcasts or jingles. You can easily create playlists from your tags in order to schedule them onto your planning.
Thanks to this video tutorial, discover how to create anD manage tags in your Radio Manager.
CREATE TAGS

Careful: It’s not possible to schedule a tag. If you want to schedule files containing the same tag, you will have to create an automatic playlist.
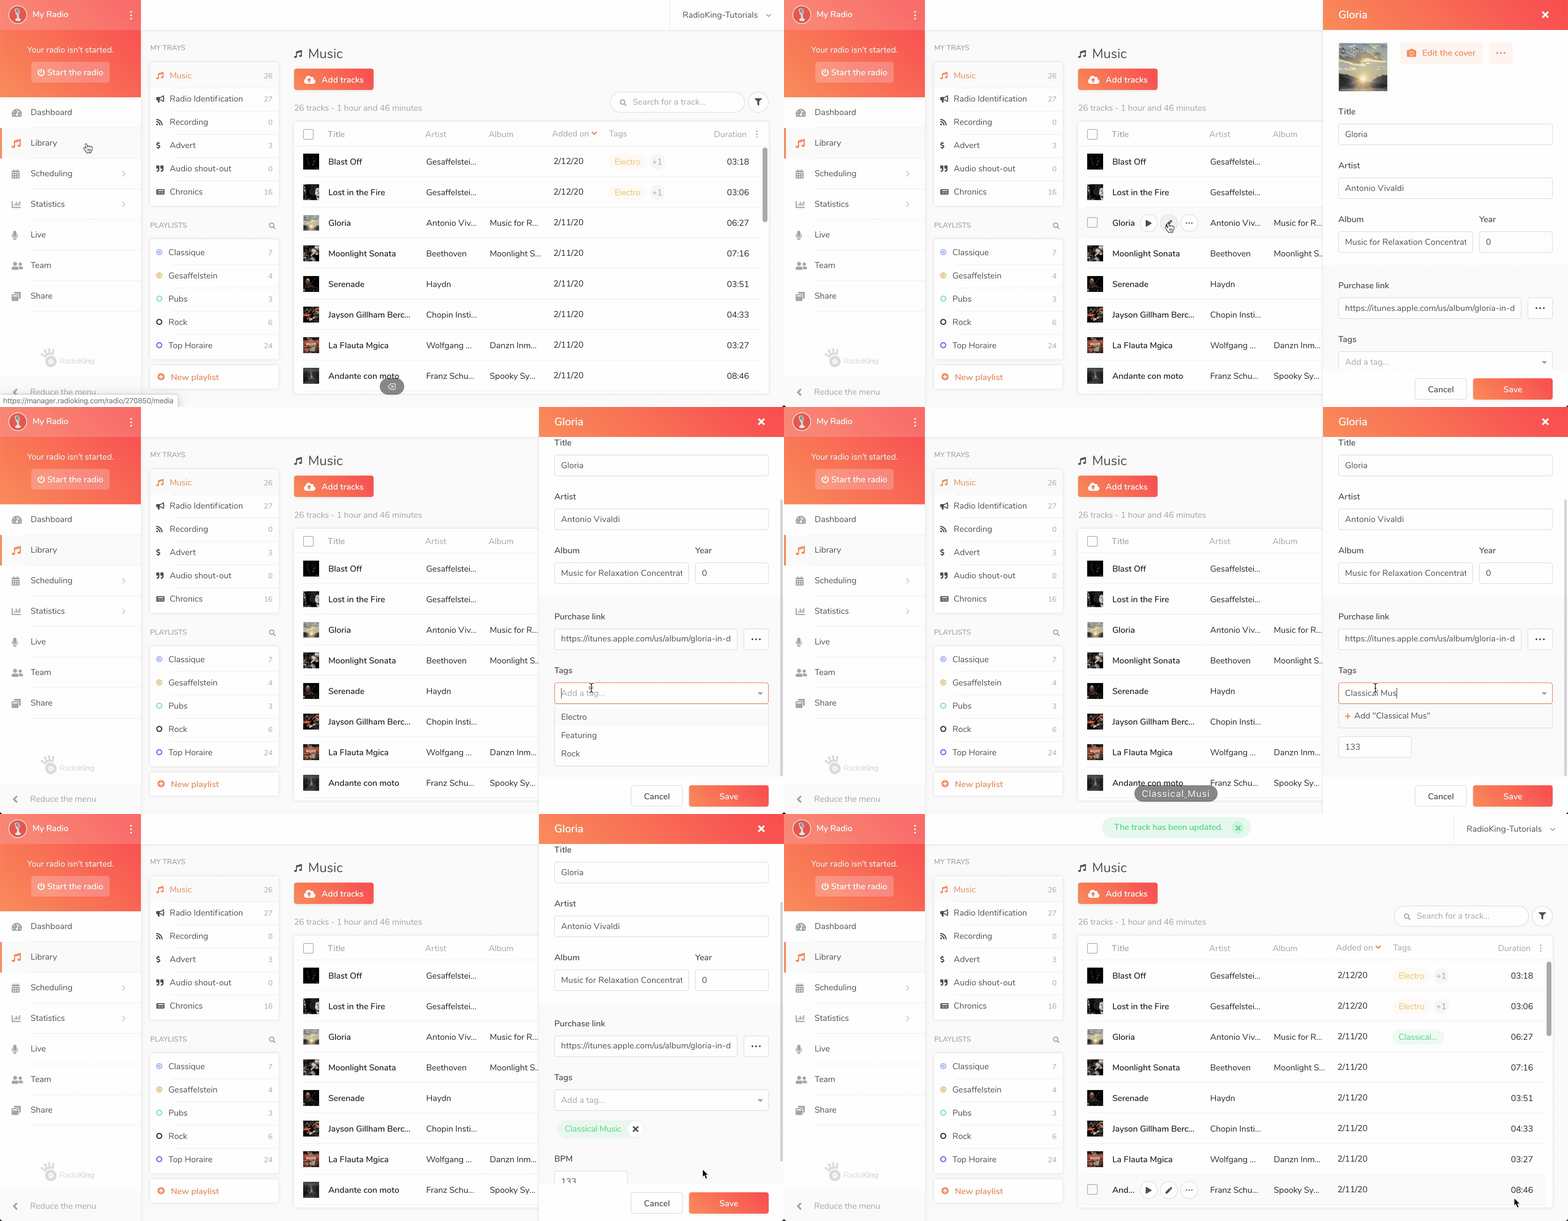
- Go to your Music Library
- Hover over the title you want to tag and click on the pencil
- In the Tags section, enter the name of your tag and click on + Add "tag name"
- Your tag will appear underneath.
- Click on save. If you want a file to contain multiple tags, repeat the steps.

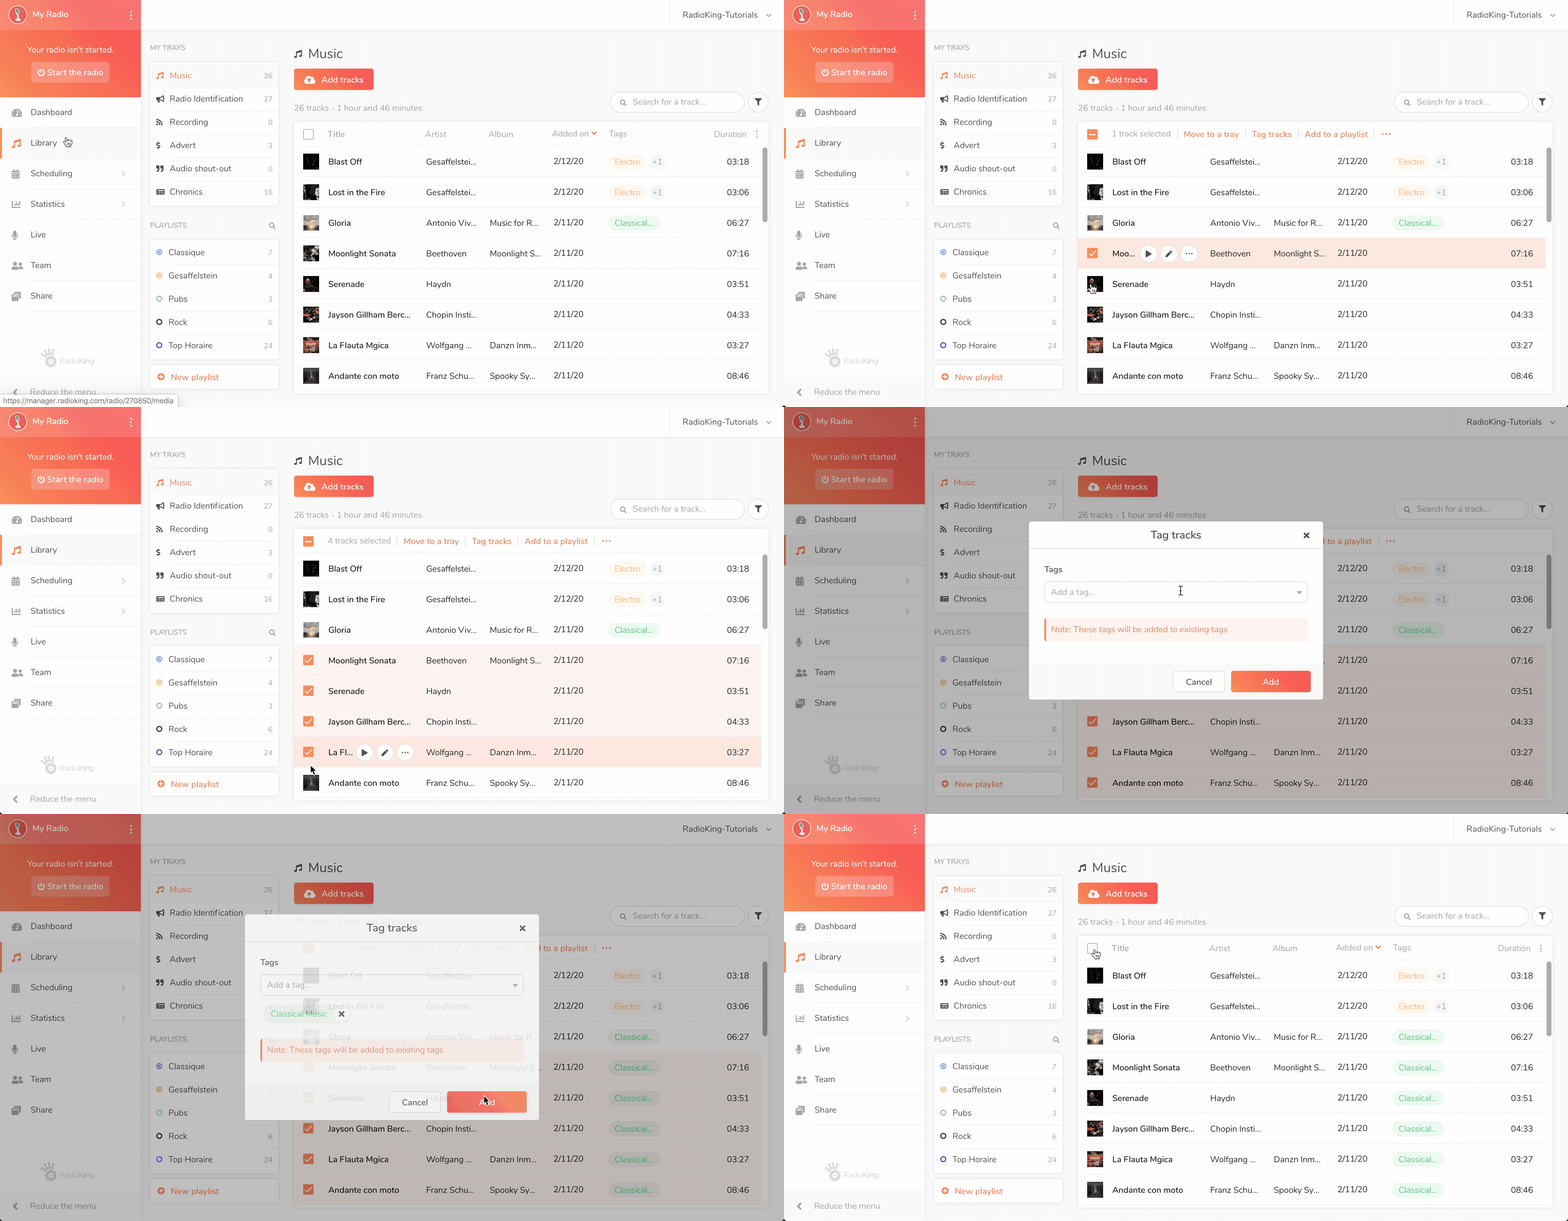
If you want to tag multiple tracks at the same time:
- Go to your Music Library
- Click on the album cover of the tracks you wish to tag
- Click on Tag tracks next to "add to a playlist"
- Add or search for the desired tags
- Click on add

MANAGE YOUR TAGS
Now that you know how to create tags, you can edit and organise them as you wish!
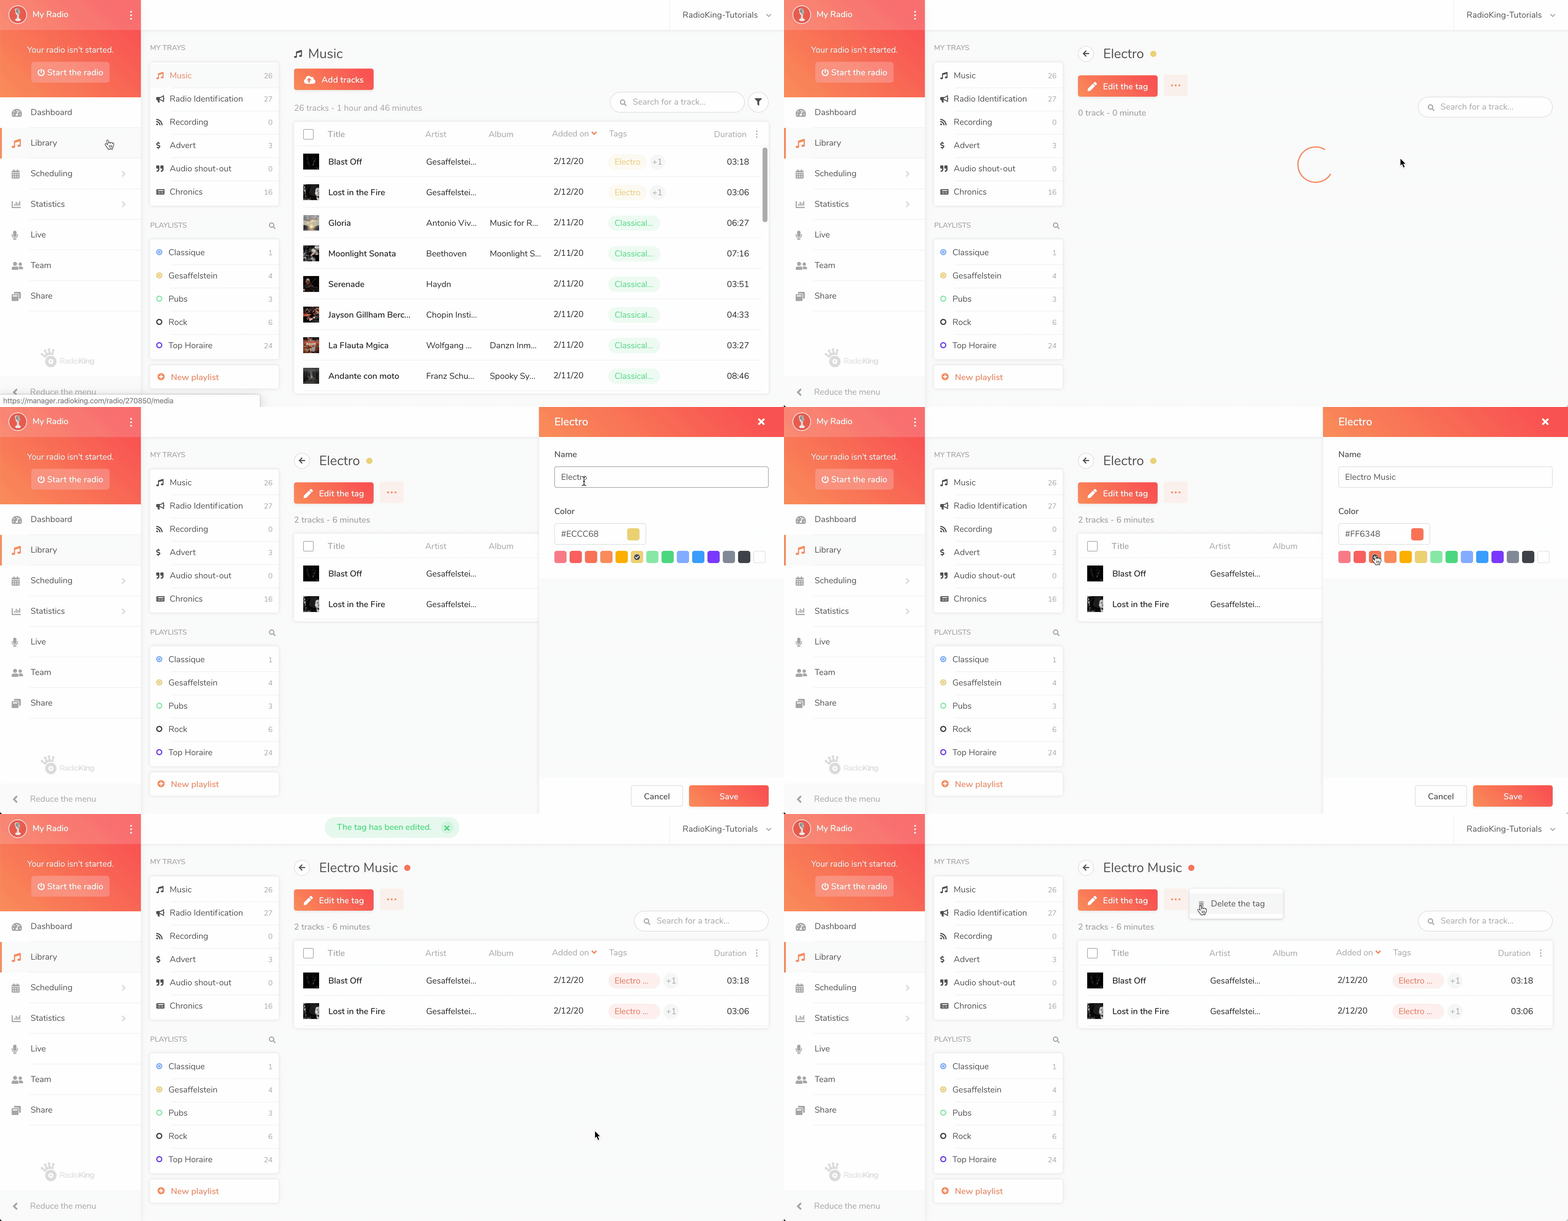
To easily manage your tags and the titles they contain, simply go to your Music Library and filter the relevant tags in the side window. You can then click directly on the tag and you will be redirected to the tag page with all the titles concerned.
On this page, you will be able to perform the same actions with your tracks as those offered in the different trays, such as:
- Tag your tracks with other tags
- Un-tag tracks
- Permanently delete tagged tracks
- Add tagged tracks to a playlist
- Edit the metadata of tagged tracks
But also:
- Edit the name and color of your tag thanks to the Edit Tag button
- Delete a tag by clicking on the 3 vertical dots next to the Edit Tag button
